
Retraining scapular mechanics in Thoracic Outlet Syndrome
Watson and colleagues provide a two-part masterclass for Thoracic Outlet Syndrome. The first provides a comprehensive outline of the musculoskeletal examination and differential diagnosis of TOS (Watson, Pizzari & Balster, 2009). The second masterclass explores the treatment strategies to manage scapular dyskinesia, muscular imbalances and improving container dysfunction (Watson, Pizzari & Balster, 2010). It was the best source of clinical information I read on this topic.
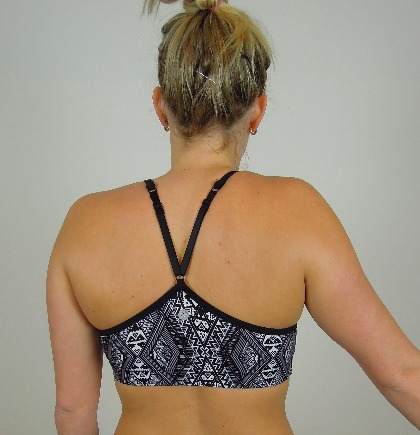
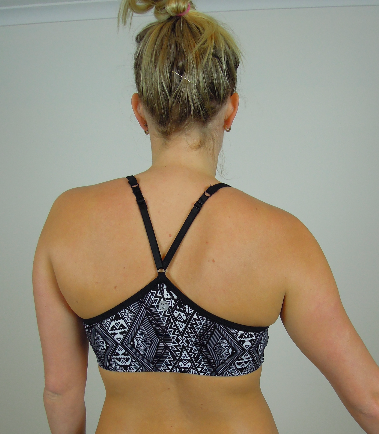
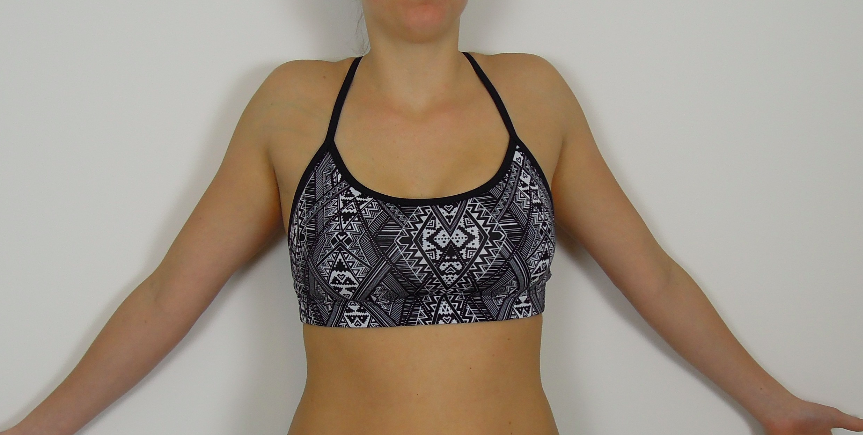
Many patients with TOS will present with altered positioning of their scapula. Most commonly the scapula is drooped (depressed, downwardly rotated and at times anteriorly tilted).
The premise of scapular retraining is that upward rotation will raise the clavicle, decompressing the neural structures within the thoracic outlet and reducing tension/compression of neurovascular structures and muscles originating from the cervical spine (Watson, et al., 2010).
"The term scapular dyskinesis, though indicating that an alteration exists, is a qualitative collective term that does not differentiate between types of scapular positions or motions" (Kibler, et al., 2002, p. 550). After noting scapular dyskinesis is present the next step is to determine what altered movement pattern is being observed e.g. downward rotation, upward rotation, retraction, protraction, posterior tilt, anterior tilt, depression, or elevation.
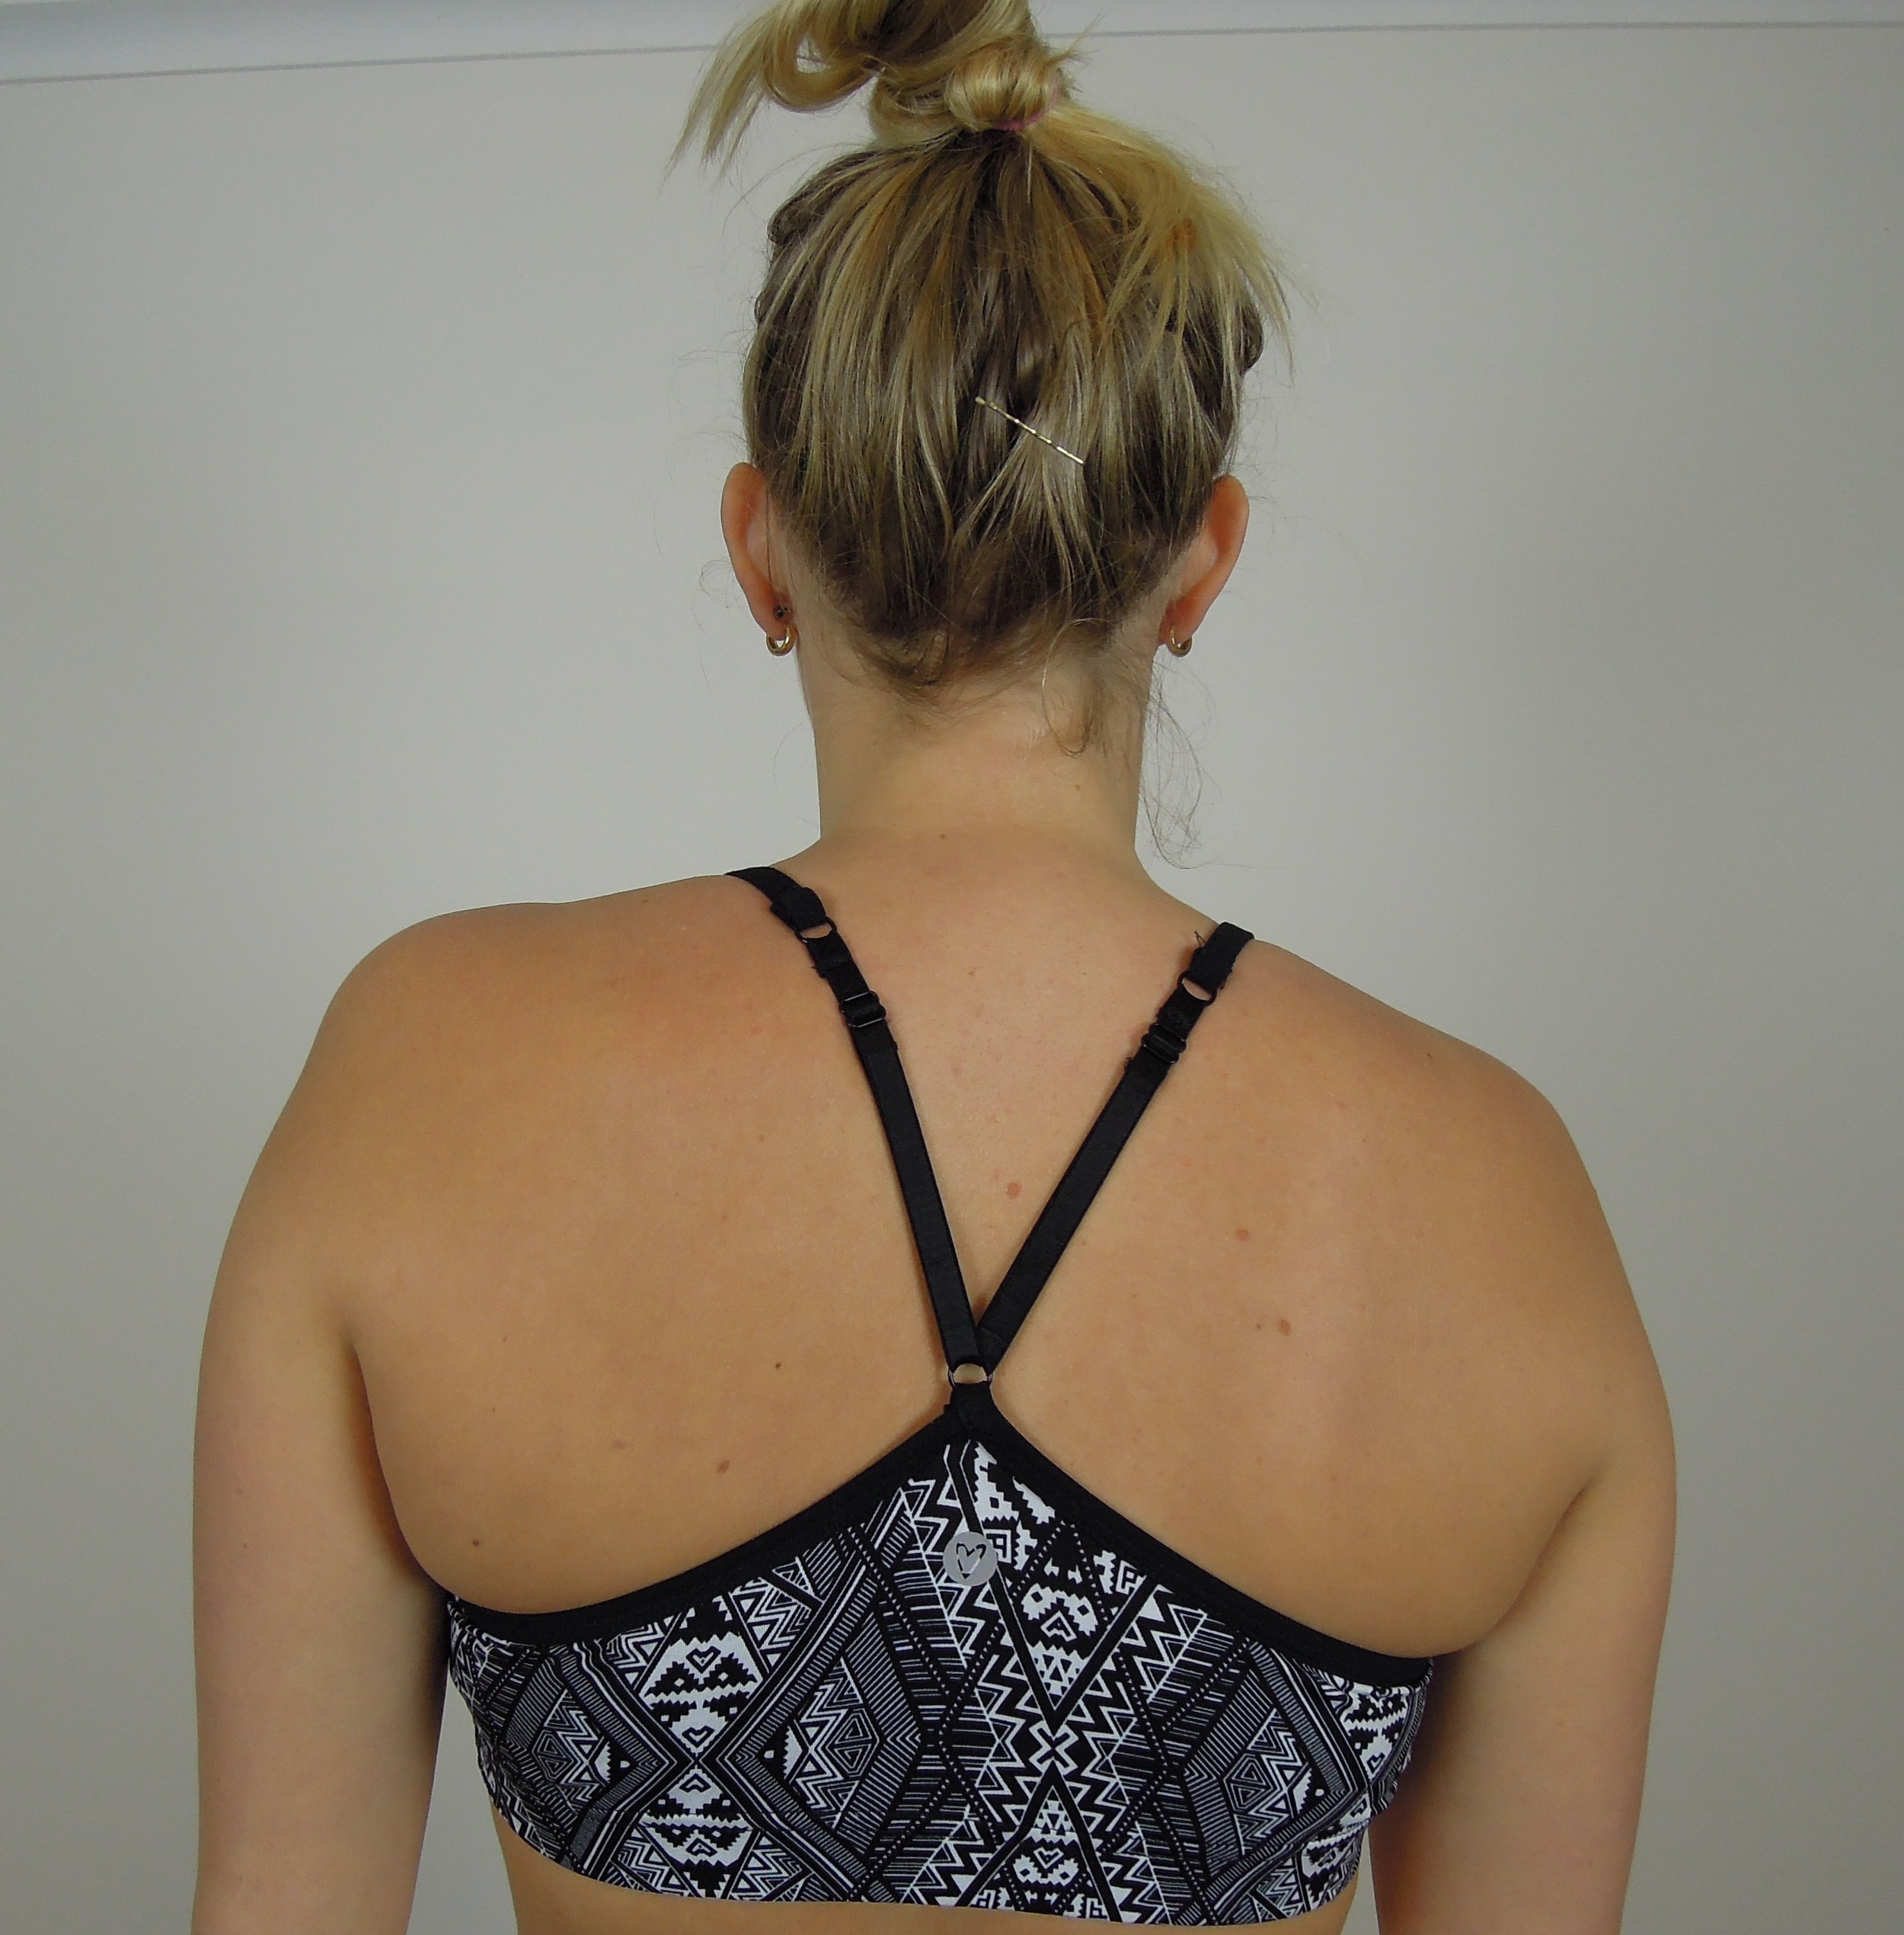
Resting postion of the scapula (depression, downward rotation and anterior tilt) in this picture
Step 1: Assessment of Scapula positioning
Determine the resting position of the scapula on the symptomatic side as this will guide further movement and muscle assessment.
To assess the resting position of the scapula I recommend 4-point palpation, which has been validated in previous studies (Lewis et al, 2002).
Use both hands to measure the position of four landmarks:
- The inferior angle,
- The base of the spine of the scapula,
- The posterior border of the acromion,
- The anterior border of the ACJ.
The inferior angle shoulder be level with T7.
- If the angle is directly below the base of the spine then check the level of the clavicle anteriorly, as this often indicates downward rotation.
- If the inferior angle is more prominant and you can palpate underneath it you are thinking anterior tilting is present. This would lead me to assess the length of muscles which create anterior tilt (pectoralis minor) and muscles which promote posterior tilt (lower trapezius).
The base of the spine of the scapula should line up with T3 and closer to the spine than the inferior angle.
- If there is increased resting tone in levator scapula or rhomboids you may suspect downward rotation and retraction. This would lead me to assess strength of muscle which create upward rotation (upper trapezius and serratus anterior).
Anteriorly the clavicle should be elevated approximately 30 degrees.
The glenohumeral head may rest up to 1/3 anterior from the glenoid fossa.
The medial border is approx 2 inches or 2-3 fingers from the spine.
- If the medial border is lifted off the chest wall, aka winging, assess for weakness/dysfunction in serratus anterior.
Taking a photo is a great way to measure change over time. Often I might draw the landmarks on my patient to mark the position more clearly. To assess scapular upward rotation during abduction I use visual observation of the contribution of the scapula and the glenohumeral joint. I use my i-phone to record the movement pattern with the patient identifying which point in range their symptoms occur.
There is little correlation between scapula positioning and pathology/injury but strong trends are being noted as we expand our assessment of shoulder problems. Remember to assess each patient individually at rest, during AROM tests, and during their functional aggravating movement to determine what pattern is present. After observing the movement/position of the scapula, observe this movement in relation to the GHJ, cervical spine and thoracic spine, as they often impact the posture/patterns of movement seen.
The final step of assessment is scapula correction. "Correction manoeuvres can be applied to any assessment position, including loaded tests such as glenohumeral external rotation. If correction of the scapula improves symptoms (pain, weakness, distal symptoms, range of motion) due to better biomechanical performance of the shoulder girdle then logically correction of the scapula position should be addressed in the patient’s rehabilitation" (Watson, Pizzari, et Balster, 2010, p. 307).
Step 2: Treatment
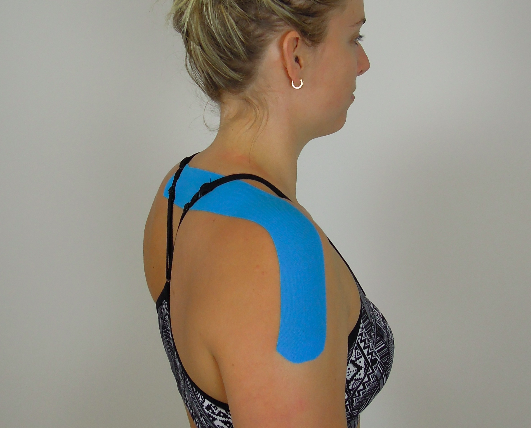
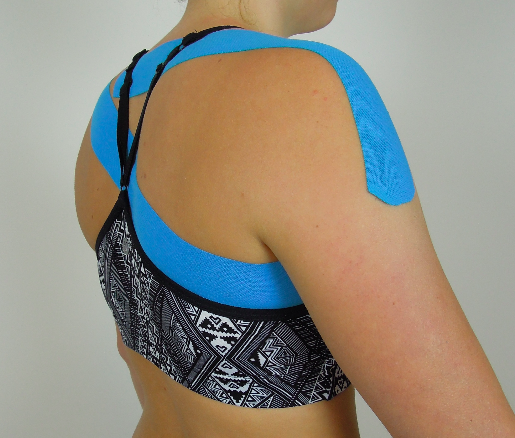
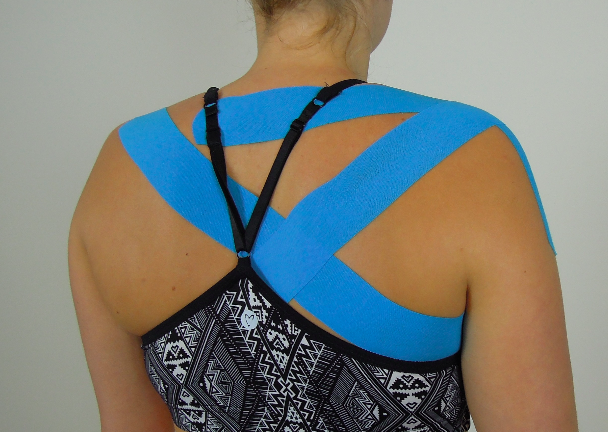
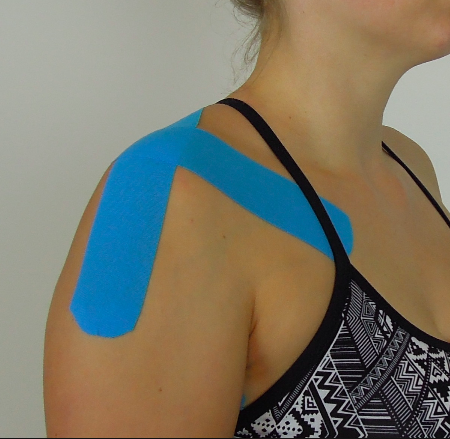
A good way to look at patients with TOS is to treat their pain before function. This is to say a patient whose symptoms are acute and severe (and potentially irritable) may not respond well to scapular retraining until their pain levels are better managed. One approach is to statically offload the thoracic outlet with taping and give positioning advice. Below are a few pictures of taping for different movement patterns. Use what is required to correct the patient's position.
Once able, the patient will then enter the phase of active scapula repositioning.
The following table provides a guide for the assessment and suggested treatment stages of scapular retraining. For some of these stages, I have described what I do in clinical practice below.
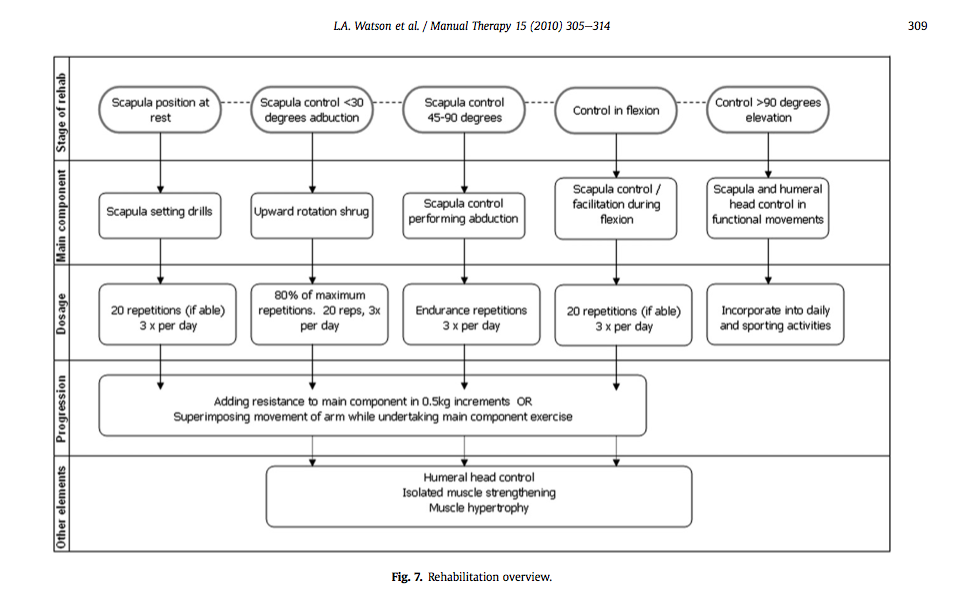
Stages of scapula rehabilitation (Watson, Pizzari & Balster, 2010, p. 309)
Scapular setting drills
Generally I start with assisting scapula correction in the mirror and asking the patient to hold the new position. Then I observe which muscles are being recruited to achieve the static hold. Once correct I gently apply resistance to the shoulder to encourage increased isometric contraction. Then the patient is progressed to self correction and setting drills. These drills may include keeping the elbow in by the side and with the palm up, moving through shoulder internal/external rotation.
Lyn Watson has produced a range of scapular setting drills using a ring of theraband wrapped around the shoulder to provide proprioception and resistance during the setting phase.
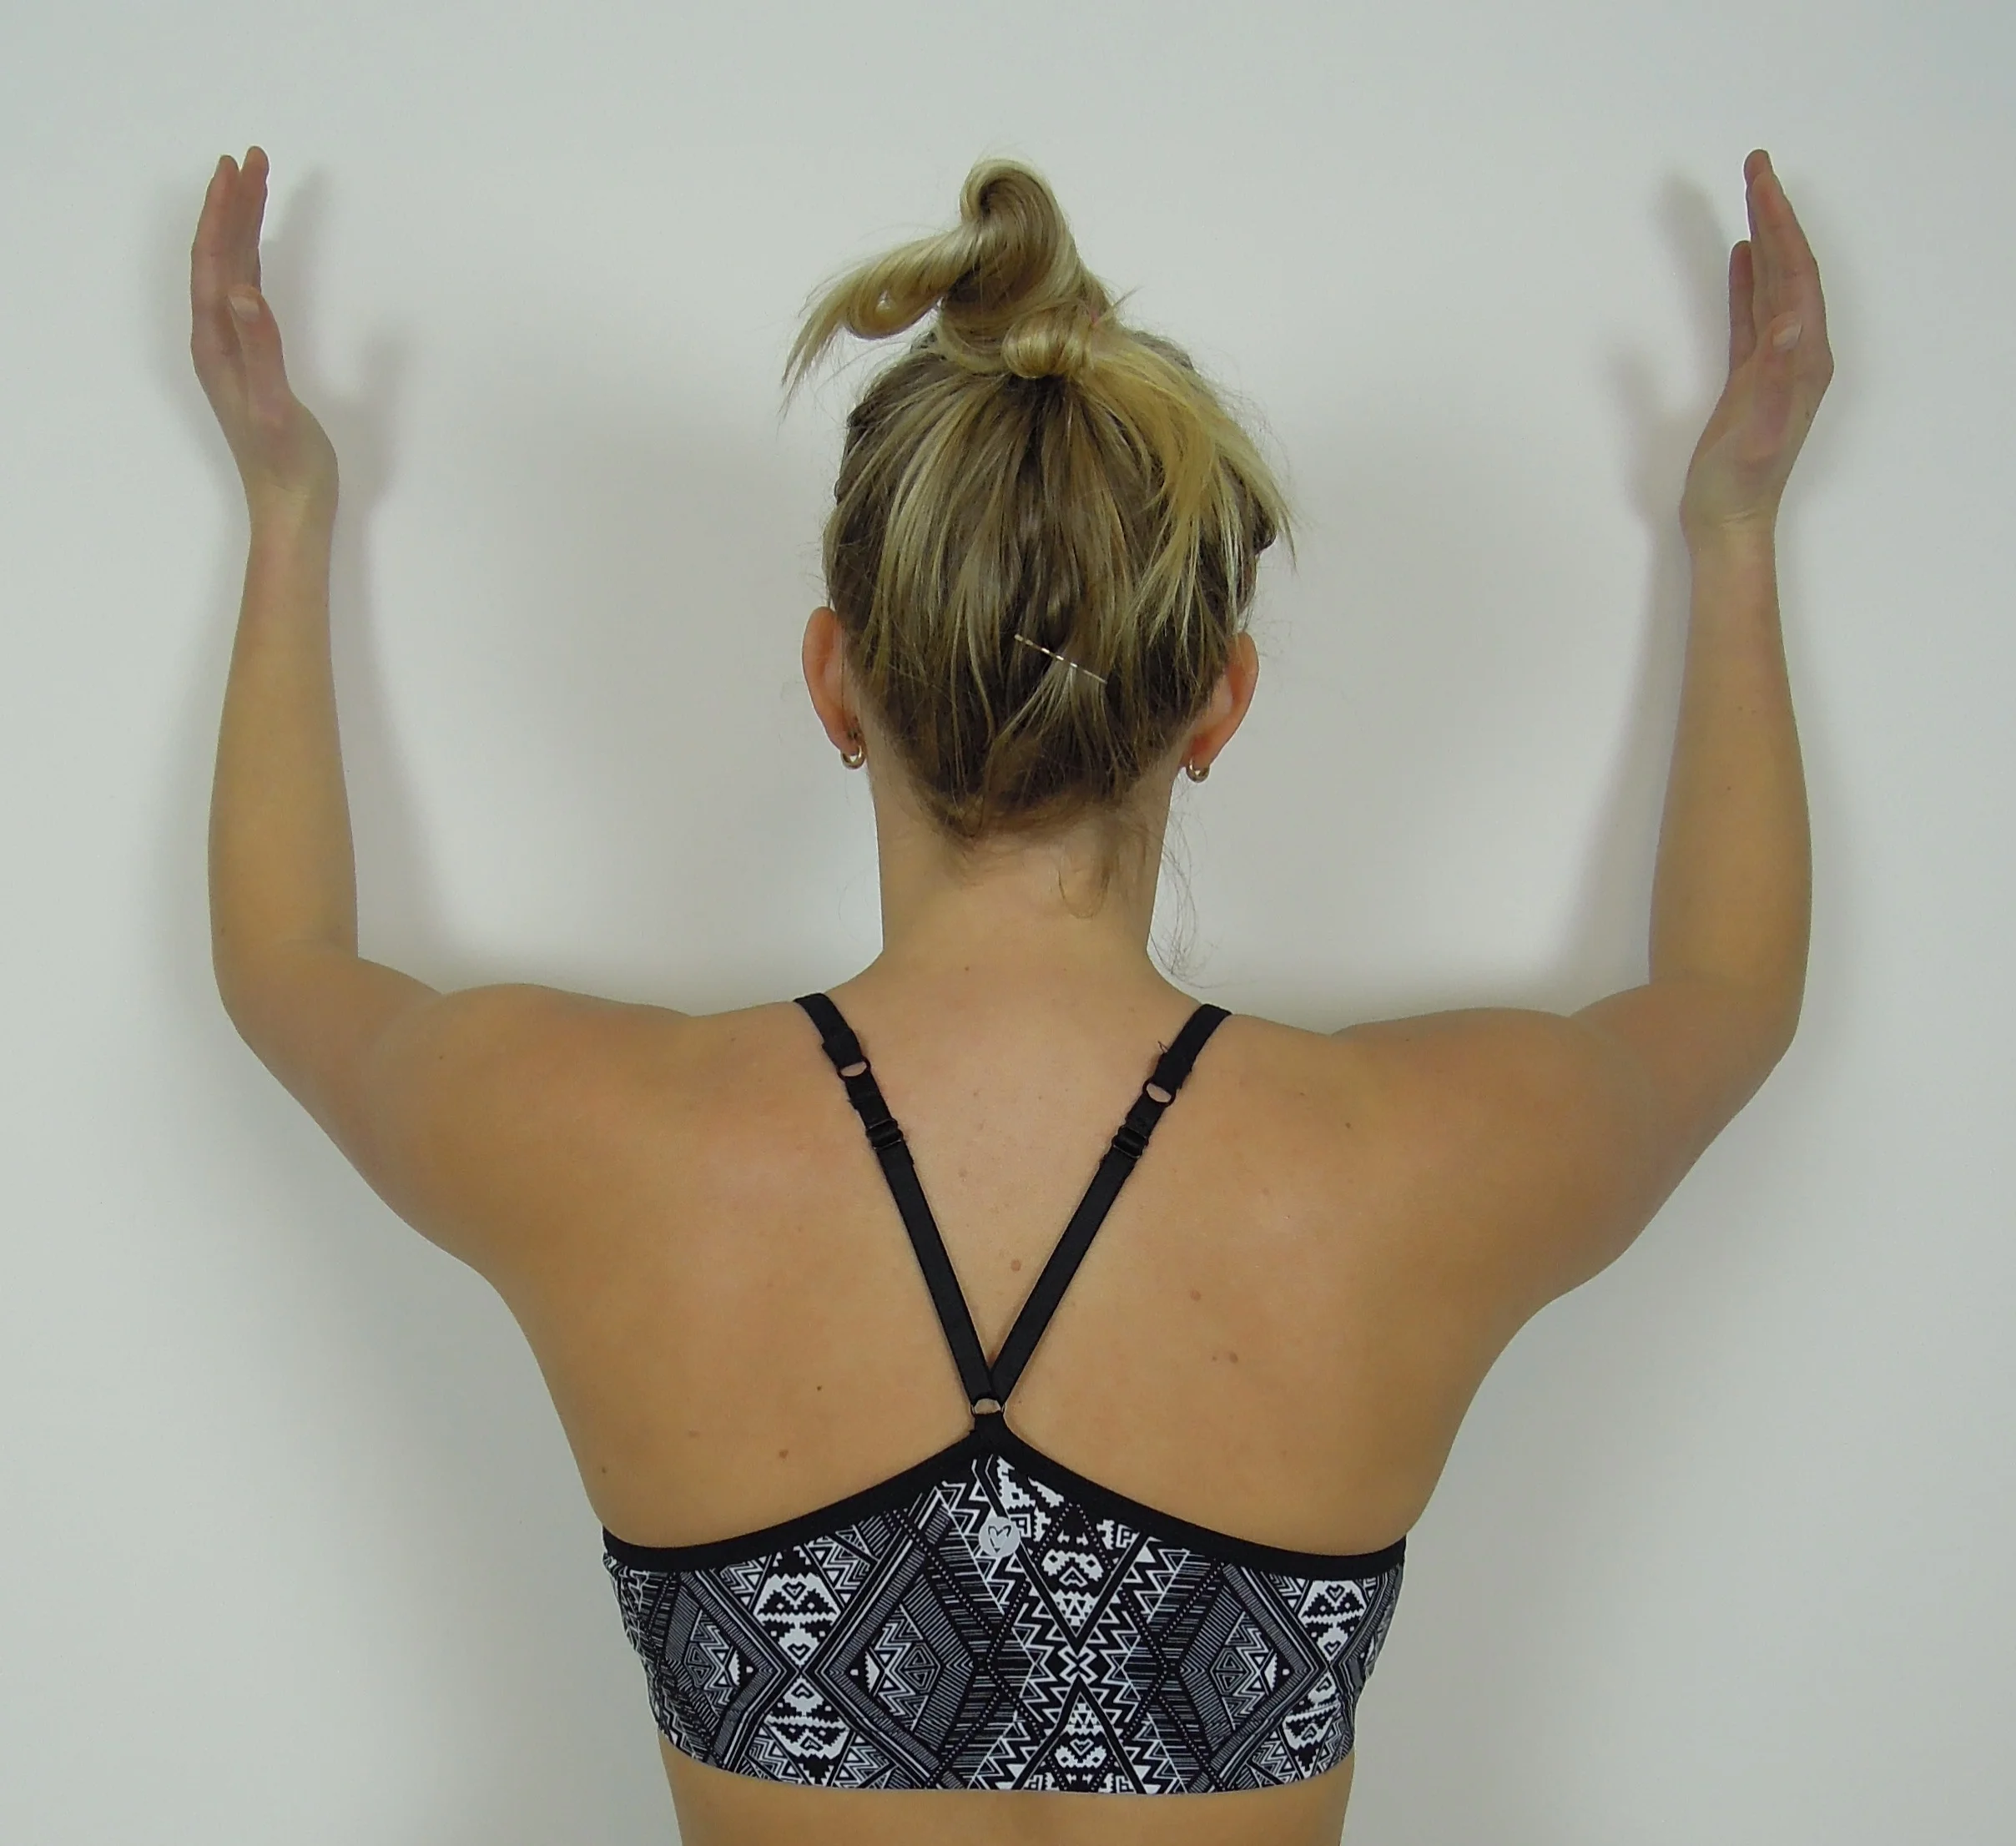
Upward rotation shrug
Start with the patient positioned in front of the mirror and their arm abducted to 30 degrees. Often I ask them to place their other hand gently on the front of their shoulder for proprioceptive feedback - this allows them to recognise if the scapula is tilting anteriorly as they lower the shrug. Also I vary the position of the arm from pure abduction to scaption depending on what gives the best results.
The instruction is to gently shrug the tip of the shoulder to the ear (not in front and not behind). The patient should observe a contraction in the upper trapezius muscle, while I look for over-recruitment of levator scapula and rhomboids posteriorly. Another instruction is not to raise the arm further up or down, but to draw up along the line of the arm - allowing for the movement to occur from the scapula and not the GHJ. Alternatively, if the patient struggles to conceptualise the movement of a shrug they can stand with their back to the wall and rub their arms bilaterally up and down the wall.
Scapular upward rotation with flexion
One technique when retraining flexion control is to position the patient in side lying and place several pillows under their arm to raise it into the flexion position. Then instruct the patient to slide their hand up the pillow above their head. This allows you to place your hands on their scapula and assist with the upward rotation movement. The patient slides their arm up the pillow without lifting it and you assist their scapula movement. This is a great retraining exercise across gravity that most patients can perform (especially when symptoms in sitting or standing are too severe).
For higher ranges of flexion control, instruct the patient to place the pinky border of their hand on the wall and slide their arms up the wall in a 'V' shape.
At this point in the rehabilitation it is important to consider the functional requirements for the patient. If they are an office worker then retraining for reaching forward and 'mouse' control is very important, as well as retraining their control in sitting vs. standing. If they are an overhead athlete, then retraining control above 90 degrees flexion/abduction is crucial.
If you are looking for further information on scapular retraining and other shoulder rehabilitation I would recommend Lyn Watson's Shoulder Physiotherapy website, which provides pictures and videos of all stages of rehabilitation. Alternatively, we have written a blog explaining the ideal exercises for scapula rehabilitation targeting specific muscle synergies.
Sian
References
Kibler, W. B., Uhl, T. L., Maddux, J. W., Brooks, P. V., Zeller, B., & McMullen, J. (2002). Qualitative clinical evaluation of scapular dysfunction: a reliability study. Journal of Shoulder and Elbow Surgery, 11(6), 550-556.
Lewis, J., Green, A., Reichard, Z., & Wright, C. (2002). Scapular position: the validity of skin surface palpation. Manual therapy, 7(1), 26-30.
Watson, L., Balster, S. M., Finch, C., & Dalziel, R. (2005). Measurement of scapula upward rotation: a reliable clinical procedure. British journal of sports medicine, 39(9), 599-603.
Watson, L. A., Pizzari, T., & Balster, S. (2009). Thoracic outlet syndrome part 1: Clinical manifestations, differentiation and treatment pathways. Manual therapy, 14(6), 586-595.
Watson, L. A., Pizzari, T., & Balster, S. (2010). Thoracic outlet syndrome Part 2: Conservative management of thoracic outlet. Manual therapy, 15(4), 305-314.