
Neurodynamic Solutions for the Lower Quadrant
In September I attended the lower quadrant course run by Michael Shacklock in LA. It was around 2 years since I attended the upper quadrant course and felt like a great time to refresh my knowledge of clinical neurodynamics and strengthen my skills in the lumbar spine and lower extremity neurodynamic assessments and treatments.
I took the UQ course in 2014 and since that time have had a significant shift in my thinking and application of these techniques. At university I was shown in one practical session the varying positions of the standard tests and thought that was the extent of them. What I learnt from the first course was the concept of regressions and progressions from the standard upper limb neurodynamic tests and these became an invaluable tool in my clinical practice for patients with more pain.
So I embarked on the LQ course with the goal of learning more about neurodynamics, listening to Michael share his knowledge about current evidence and how it is guiding practice and research, and how to apply these skills to the lumbar spine and lower limb. The course covered well known tests such as the slump test, straight leg raise and it’s variation, but even then I learnt so much more about the specificity of handling and interpretation of findings. The aim of this blog is to share a few of the many tips that I took away from the course.
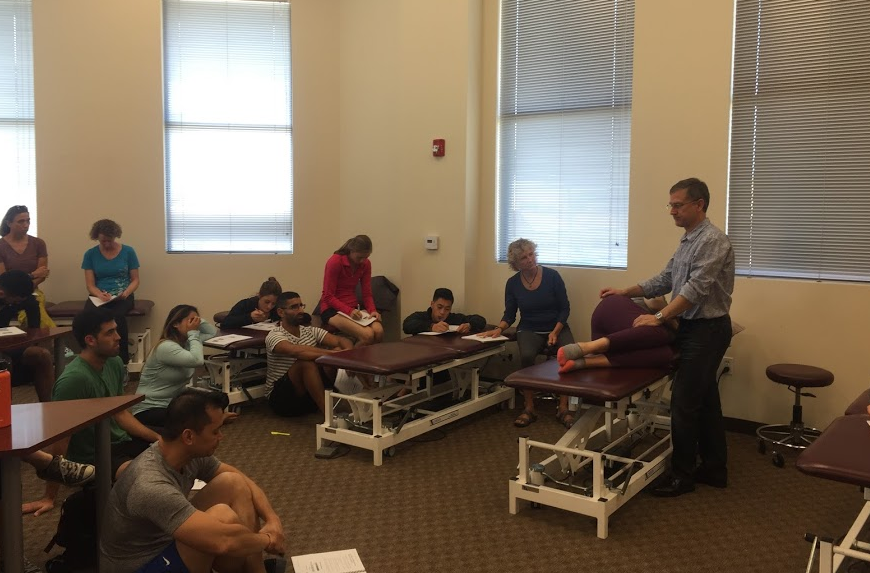
Michael is attentive and involved with each student in the group.
When it comes to clinical neurodynamics there is a necessity for the therapist to process the skills required to perform the movements of each test, identify abnormalities and protective responses, and interpret them in the context of the patient and the test. To achieve this understanding, Michael spends considerable time with each participant of the course practicing and reviewing manual handling, placing a strong emphasis on the research behind these methods and teaching clinicians how to apply these principles to everyday patient examples. The value in this practical instruction cannot be overlooked.
Each time I review my knowledge of physiology and mechanics of the nervous system I realise how much more there is to learn. About the nerve pathways, about normal neural physiology, about nerve palpation and about using neurodynamics in clinical examples.
A brief overview of the reasoning process
Like most physical assessments we use, neurodynamics has a structured process and is goal-orientated. We are not simply looking for a positive or negative test result. In fact, taking the terms positive and negative out of the equation would make interpreting these tests a whole lot more simple.
The first decision for every therapist to make is to determine an appropriate level of assessment that is safe for the patient in front of them. These are divided into 4 levels (each described below) of level 0, 1, 2, and 3.
The second decision for the therapist to make is to interpret the test results. In terms of interpreting the tests we can use the words normal response, covert abnormal response and overt abnormal response. It is normal for a test to produce a neurogenic response and it is the task of the clinician to distinguish between normal and abnormal responses with each patients.
An important point to remember when interpreting the tests is that having an overt positive response on a neurodynamic test does not differentiate the cause of the problem and we still have to identify whether there are faulty mechanics or faulty physiology within the neural tissue. The easiest way to explain this is that if A+B = C we cannot simply assume that C-B = A. When performing neurodynamic tests therapists are required to related the findings of each test back to the rest of the assessment in order to determine if the problem lies within the nervous tissue itself, the tissues it innervates, or the surrounding interface of soft tissue structures.
The third decision to make, once an overt abnormal response has been identified is to decide if the is then to decide problem is due to pathophysiology or pathomechanics.
PATHOPHYSIOLOGY
Pathophysiology refers to damage to the nervous tissue through inflammation or hypoxia which often leads to chemical changes within the tissue such as mechanosensitivity, lowered threshold for activation and increased response to input. Pathophysiology can occur as a result of the mechanical dysfunction i.e neural tissue inflammation due to compression from an intervertebral disc herniation, or neural tissue changes which occur with disease processes such as diabetes.
PATHOMECHANICS
- Is there an interface dysfunction that needs addressing i.e. open or closing dysfunction?
- Is the problem due to excessive or reduced movement at the interface?
- Is there a neural dysfunction that needs addressing i.e tension or sliding dysfunction?
Areas where my knowledge changed during the course
The principles of neurodynamics provide a system that can be applied to the body, no matter the region. This course had a strong focus on apply neurodynamics treatments for lumbar nerve root pain and peripheral nerve syndromes such as piriformis syndrome and tarsal tunnel syndrome. What was brilliant about the course was to systematically review the LQ and to look at each body region to understand how injuries in that region are treated rather than simply thinking you can apply the same principles to every joint. It often feels like there are several 'ah-ha' moments during these courses. Below are two examples.
Example 1: For the lumbar spine, closing dysfunctions are often managed at the interface by using a static or dynamic opening technique. Which makes complete sense because if there is pain and increased pressure on the nerve with closing movements (extension and lateral flexion) then opening through flexion and lateral flexion can reduce nerve pressure, improve blood flow, increase canal diameter and temporarily improve pain.
What about if the patient with nerve root pain has an opening dysfunction? How would you manage that? Just because we open when structures don’t like to close doesn’t mean we close when structures don’t open. Closing would only increase the pressure on those structures. The challenge therefore is to use interface techniques to improve opening dysfunctions and while these were covered in the course, you can also read about them in Shacklock’s book Clinical Neurodynamics.
This was a great example and discussion point for me to further understand the principles of designing treatments. There are two main models for neurodynamic treatments:
- What is good for the nerve is good for the muscle, and therefore joint/soft tissue treatment techniques will be helpful to both.
- What is good for the nerve isn't good for the muscle and different treatments are required.
Example 2: A second example of the changes in my understanding of neurodynamics relates to the tibial and peroneal nerve biases and how/why/when we apply them to the SLR or slump test. The tibial or peroneal slider can be used in a slump slider (treatment) as sensitising movements for the lumbar nerve roots because they are distal or removed from the location of injury. But, these movements cannot be used in the treatment of tibial and peroneal nerve injuries related to the ankle due to the theory of convergence and nerve gliding. This theory described the ways in which nerve move: longitudinal and transverse sliding, elongation, bending and convergence. When ever considering the movement of the neural structures at each joint just remember that the nerve will converge (i.e. move towards) towards the joint at which the movement is occurring.
So coming back to the movement of a 'slump slider'. When you move the knee into extension, at the level of the ankle the nerves converge towards the knee but. But, when you plantar flex and invert the ankle (making it a peroneal bias), the interface moves caudally and therefore in relation to the movement of the interface, the nerve moves further up towards the knee. Therefore while this movement creates a slider treatment for the level of the lumbar nerve roots, it actually creates a nerve tensioner (not a slider) at the level of the ankle.

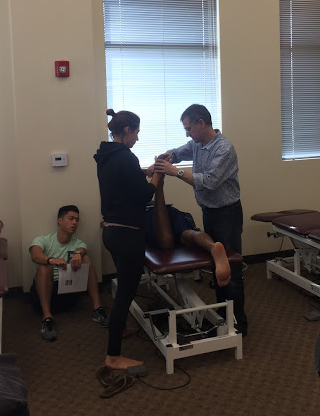
Michael performing an interface-directed manual treatment for tarsal-tunnel syndrome.
Levels of assessment
As mentioned above, the first decision for each therapist to make is selecting an appropriate level of assessment. Understanding that there are levels to neurodynamic assessments was only introduced to me during Michael's courses. The idea that tests can be regressed or progressed to match the suspected severity, irritability and nature of the patient's pain is a core focus of both these courses.
Level 0 = neurodynamic examination is contraindicated
- Severe, progressive and widespread neurological symptoms are a contraindication to assessment until they have had a full medical work up.
- Tethered spinal cord (bilateral tight hamstrings).
- The ‘hands-off’ patient.
Level 1 - limited examination
"The level 1 (limited) examination is performed when care not to provoke symptoms is the primary concern. Some of the components of a neurodynamic test may be omitted so that only minimal forces are applied to the nervous system. It may also be necessary to modify the sequence of movements to achieve the desired goals. In the level 1 examination, the full neurodynamic tests are not completed" (Shacklock, 2005, p.108).
Suited for:
- High levels of irritability i.e severe pain, easily provoked, and/or difficult to ease or relieve.
- Continuous pain .
- Night pain.
- Latent pain.
- Radiating symptoms.
- Neurological symptoms.
- Level 1a - position out of tension with the ipsilateral side and position further out of tension with the contralateral side.
- Level 1b - position out of tension with the ipsilateral side (same as Level 1a) and move out of tension with the contralateral side.
- Level 1c - position in tension with the ipsilateral side and move out of tension with the contralateral side.
- Level 1d - position out of tension with the contralateral side and move into tension with the ipsilateral side.
- Level 1e - position in tension with the contralateral side and move into further tension with the ipsilateral side. Level 1e is essentially a standard/level 2 examination.
If you're still struggling to understand how these positions work, Michael has shared this video explaining the movements described above.
Level 2 - standardised assessment
The lower quadrant course covered the slump test and straight leg raise test with it's peripheral nerve variations. I found practicing these different positions to be an invaluable experience. If you don't get the handling correct and sustain the foot and knee position, you won't get the best information from the test. One thing I changed about my handling for the lower quadrant was the position of my upper hand when stabilising the knee. If you are stabilising the knee you need to place your hand on the tibia and not the femur.
"The neurodynamic tests are performed to a comfortable production of symptoms. If sufficient information has been gathered without much in the way of symptoms, all the better. It is not necessary that the tests be taken to their end range but it is permissible, as long as this is clinically appropriate. The neurodynamic position is only held for a matter of seconds" (Shacklock, 2005, p.109).
Level 3 - advanced neurodynamic examination
- 3a ‘more of the same’ = neurodynamically sensitised movements with more hip internal rotation, adduction and lumbar lateral flexion to the contralateral side. These are the sensitising movements for all neurodynamic tests of the lower quadrant.
- 3b ‘targeted sequencing’ = load the problem area first in the sequence of events to emphasise a particular part of the nervous system.
- 3c ‘multi-structural’ = where neural structures are assessment in combination with musculoskeletal tests.
Some points to think over
- During assessment, if you can exclude neurodynamics as a problem it will make the clinical reasoning process clearer.
- Neurodynamics does not mean neural tension.
- In 96% of healthy individuals there will be a change in symptoms with structural differentiation. This is not considered a false positive test result. It is about how we interpret the positive result to determine if it is a overt or covert response and if it relates to the problem.
- There are three ways to move a nerve: move the joint it crosses, move the tissue it innervates, or move the interface surrounding it.
- Structural differentiation is involved in every neurodynamic test and involves movement of a body part away from the area being assessed to evaluate the effect of mechanical force on the nervous system and its impact on the problem/pain.
- Using structural differentiation we can safely sequence movements from protective movements to sliders then to tensioners and through to focused movements.
I encourage you all to continue your reading and learning about the concepts of normal neurodynamics and pathoneurodynamics as it has been such an insightful and clinically useful experience for me.
You can follow neurodynamic updates from Michael Shacklock directly via Research Gate or attend his world-wide course. More information is available at Neurodynamic Solutions.
Previous blogs on neurodynamic topics
- Contralateral knee extension - a new advance in the slump test
- Neurodynamic solutions for the upper quadrant
- A neurodynamic approach for posterior shoulder pain
- Neurodynamic treatments for thoracic outlet syndrome
- Improving hamstring flexibility - assessment & treatment
References:
Shacklock, M. O. (2005). Clinical neurodynamics: a new system of musculoskeletal treatment: Elsevier Health Sciences.
For further information I would refer you to Shacklock's text book Clinical Neurodynamics.